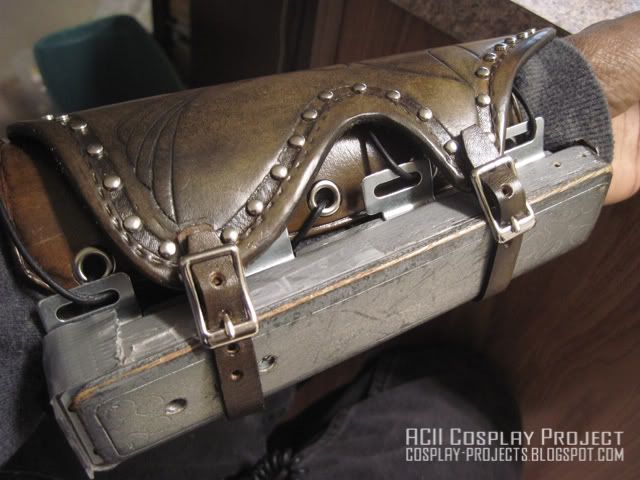
Decided to get to work on the left bracer!
Was a bit difficult getting really good references, but ran across a couple old screencaps from when the old Animus promotional webcam thinger was running. 
Here's the current state. Sill need to sculpt the bigsilver embellishment on the top, and make the gun & dagger (AC1 dagger sitting there as a placeholder!
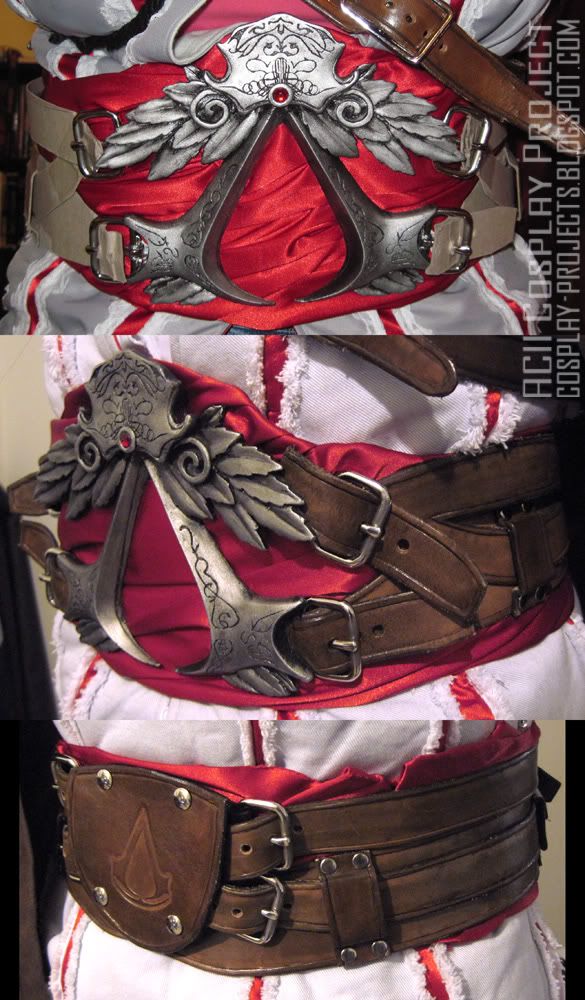
Well, the belts been done, just in time for AC2's release (i threw on what was done and ran out to the midnight release for the fun of it, though i couldn't pick it up til the next morning (ordered from another store duh me)
here's the completed belt, with sash underneath, and leather straps and all that fun jazz. Just remembered i need to add a couple bits onto the right side of the red undersash thinger though.. that'll cover up the hook n loop setup that makes it muuuuch easier to put it on :3
Click post title for how this was done :)
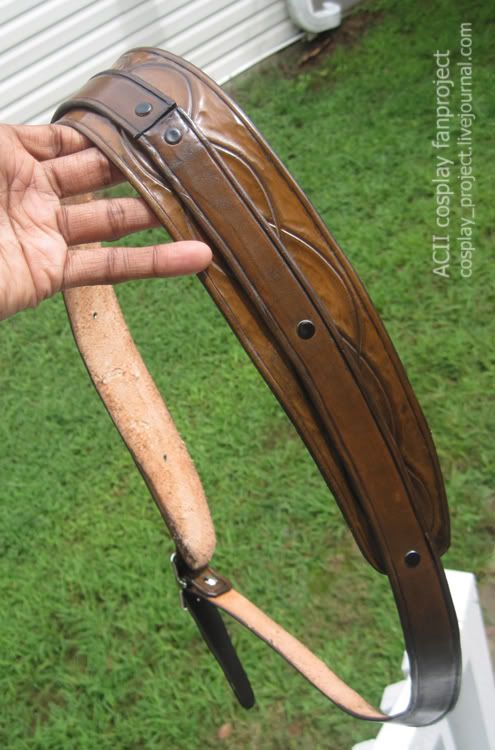
Yesterday I somewhat completed the shoulder strap that crosses under the pauldron. I didn't use a straight piece of leather since it would dig into my ribs, and had to make it out of two pieces to save on leather. I can't say i like how the splice turned out and went and used rivets to secure it to save time, but I'll be aiming to replace that strap and properly sew it on. But this'll have to do for the time being, cuz Dragon*con's in 5 days and i still have to finish a painting.
It would be nice to have a machine to sew this.

This thing was actually a bit more of a pain than expected, but here's the result.
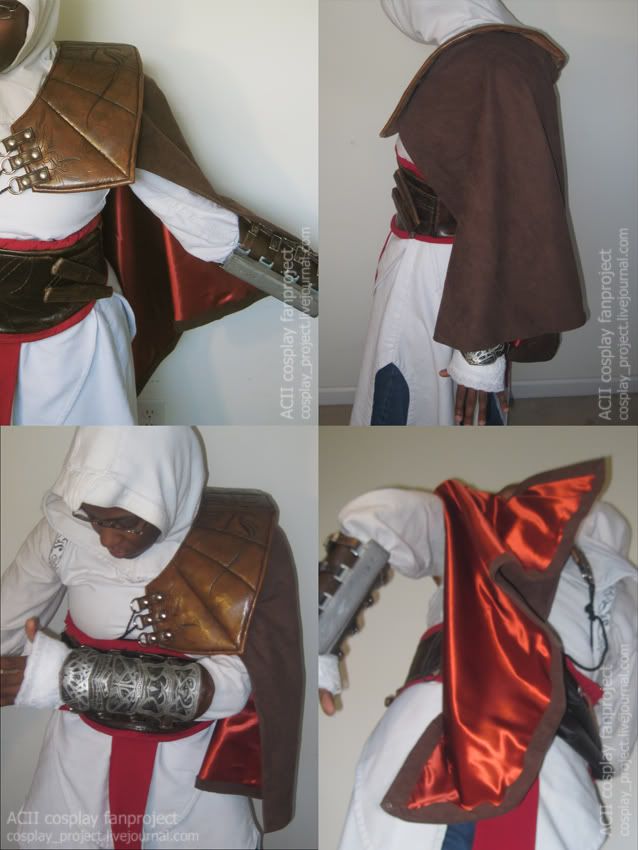
I added a cord for times when a breakaway cape isn't necessary, and will go and change out the velcro to industrial strength velcro. (the standard stuff isn't quite strong enough). Will bring the velcro closer to my neck on the pauldron, so when i flip the cape back, it'll be more likely to stay.
This is made from 2 pieces of tooling leather (6 or 8 oz i think) and foam padding interior to give it a squishy feel and some weight. I sanded off some of the thickness of the leather with my belt sander so it would be easier to get a padded look. Though its not as padded in the refs, but i wanted to have it look padded anyways :)
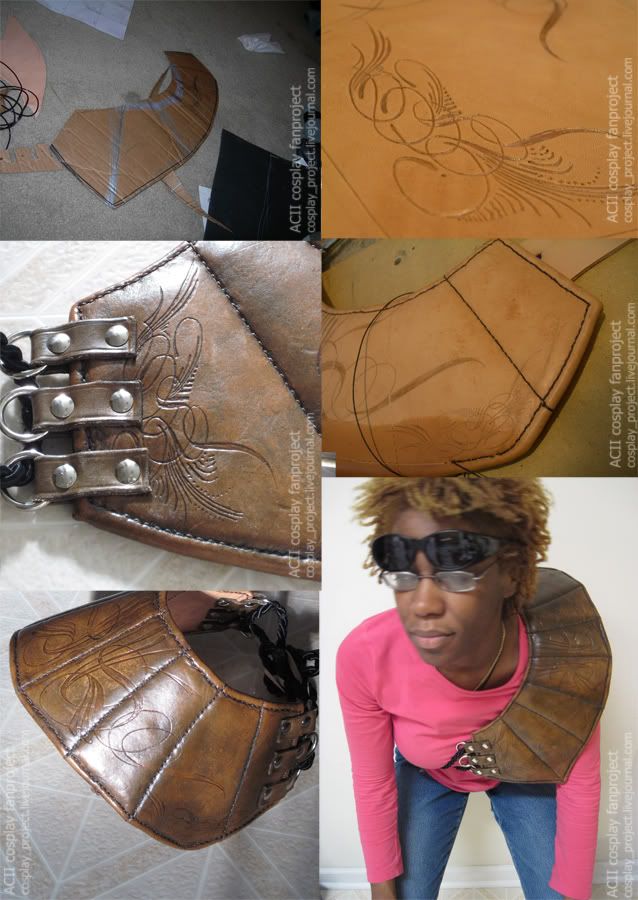
I wasn't aware that there was stuff that I could apply to mask off the scrollwork (so when dying the thing it would stay light), so when it dyed, the color actually wound up a lil darker than the untooled areas..